hello,
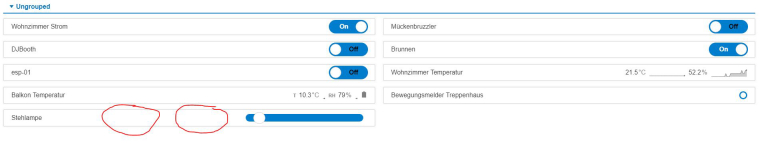
can anybody tell me if theres a way to add some buttons to a homeduino dimmer device? i just want to add a button which sets the dimmer to 0 or to 100?
Add Buttons to a Dimmer
hello,
can anybody tell me if theres a way to add some buttons to a homeduino dimmer device? i just want to add a button which sets the dimmer to 0 or to 100?
@Nikolov
If the Device does not give you these buttons you could generate some dummy buttons and use rules/scripts to change the value with it. Unfortunately this will give you another row with a separate device.
Another option is maybe use of an complete other dummy device on the frontend at all. Maybe there is something gives you the wanted visual style and you try to “connect” it to the existing one via rules. Could be very tricky to connect but maybe works your way. ")
thanks for the fast reply, that was also my first thought, but i cant find a way to add a slider to the buttons device, if that was possible i could make the original dimmer invisible…
I think it’s not possible to generate a custom device (one row in the gui) in the way you try to. But maybe there is already one existing like Dummy-Led-Light and you can use this to replace yours on the GUI. Ofcourse you still ned the device (invisible on screens) to interact with homeduino.
https://pimatic.org/plugins/pimatic-led-light/
ooh damn, sure, i just can get an led plugin an link it to the invisible homeduino device…
thanks a lot mate!!
btw. maybe would be a cool thing to add a “dummy generator” with all the stuff (buttons,dimmers,rgb-picker…) so you dont have to search a plugin which contains a device with the things you need 
@Nikolov said in Add Buttons to a Dimmer:
btw. maybe would be a cool thing to add a “dummy generator” with all the stuff (buttons,dimmers,rgb-picker…) so you dont have to search a plugin which contains a device with the things you need
An interesting idea 
Btw: Unfortunately Pimatic does not have, as one of the last, “dummy rgb-picker”.
Pimatic = Smart Home
I asked as well longer ago. Hope really to get this in future.
I just created and posted to github a plugin that maybe able to help with this.
It provides a single device, DimmerProxy, and has the following configuration options:
device_id - the id of an existing device which has the changeDimlevelTo action.
display_as - how the device should be displayed in the mobile-front-end. For now, it can be either switch or dimmer. This can be changed after its created, if need be.
*sync_name - should this device sync its name to the original device. If the original name of the device is changed, this device will change as well.
This device will update its state and dimlevel in sync with the original device. Commands to this device will be proxied back to the original device.
This doesn’t solve the problem of creating a second device. Using this device, though, eliminates messing around with rules and dummy buttons, which should make it fairly straightforward to create and us custom templates. If anyone wants to design one, I can add it to this plugin.
I just released this, so anyone willing to test is appreciated. (I tested it with a dummy dimmer device, and it worked fine.)
@amit-patel said in Add Buttons to a Dimmer:
osted to github a plugin that maybe able to help with this.
It provides a single device, DimmerProxy, and has the following configuration options:
device_id - the id of an existing device which has the changeDimlevelTo action.
display_as - how the device should be displayed in the mobile-front-end. For now, it can be either switch or dimmer. This can be changed
Nice. Instead copying your helper functions from one project to next, please consider publishing them as a package of its own - or even better: please have a look at lodash which is already contained in pimatic (lodash version 3) and covers most of your helper features.
You can simply use it (package dependency needed) using the following import:
_ = env.require 'lodash'
"It always takes longer than you expect, even when you take into account Hofstadter's Law.", Hofstadter's Law
@amit-patel wow this is some great work! Just tested it out and it works! I can set it up as a dimmer and as an on/off device. Now the next step is to have it all in one. So a slider and a dimmer as one device (on/off button and a slider next to it).
@Gratizzz said in Add Buttons to a Dimmer:
Now the next step is to have it all in one. So a slider and a dimmer as one device (on/off button and a slider next to it).
Which is doable with a custom UI template, however, to serve other user’s needs a generic UI device container is required which can render dynamically added UI elements - that’s my understanding of the “dummy generator” mentioned by @Nikolov
"It always takes longer than you expect, even when you take into account Hofstadter's Law.", Hofstadter's Law
@mwittig said in Add Buttons to a Dimmer:
that’s my understanding of the “dummy generator” mentioned by @Nikolov
exactly, is it possible that there are Problems at the plugin Server? i cant connect Today?
Yeah I have the same problems with the plugin page. I installed the plugin directly from github.
@Nikolov said in Add Buttons to a Dimmer:
is it possible that there are Problems at the plugin Server? i cant connect Today?
Possibly. See https://forum.pimatic.org/topic/3304/timeout-for-plugin-section
"It always takes longer than you expect, even when you take into account Hofstadter's Law.", Hofstadter's Law
@mwittig I’ve been meaning to publish it to npm for some time, but haven’t gotten around. I use a script to create new projects, and this folder gets copied over as part of the process, which works fine for me.
I’m aware of lodash, but not generally not a fan, and especially not a fan when using for projects that require older node and coffee-script versions where I can’t shake the unused lodash modules from my dependency tree.
@mwittig Yes, this makes sense. Having gone through the front-end and core pimatic codebase, it’s probably doable, but I think would require a significant amount of work (and time). It seems though that the core front end code has not been updated in 2 years, and dynamic templating would have to live there, no?
I intended this plugin as a stop-gap feature for anyone that may want to use different template versions for the same device today, without having to do a full blown re-creation of the original device.
I also tested another method that could work that would allow achieving the same result as this plugin using DeviceConfigExtensions. However, this approach still requires custom templates to be created, and would also require individual plugin owners to implement it to their device configs, which is why I like this plugin approach better.
The extension could look something like this (its very crude, and should be considered a proof of concept):
class DimmerUIDisplayExtension extends DeviceConfigExtension
    configSchema:
      xDimmerDisplayAs:
        description: "The mobile front end template to use for display"
        type: "string"
        enum: ['switch', 'dimmer']
        default: 'dimmer'
        required: yes
    apply: (config, device) ->
      if config.xDimmerDisplayAs?
        device.template = config.xDimmerDisplayAs
        if device.template is 'switch'
          device.attributes = _.cloneDeep(device.attributes)
          device.attributes.dimlevel.hidden = yes
          device.attributes.dimlevel.displaySparkline = no
Also, to all, this plugin hasn’t been published to npm yet. It needs to be installed directly from github, as it’s an alpha release, and requires far more testing. I literally started and finished it last night, so, i would like to see how it holds up for at least a week. Also, as mentioned, testers are certainly welcomed.
To install, first stop pimatic and from the root of the pimatic-app folder:
cd node_modules
git clone https://github.com/aap82/pimatic-dimmer-proxy.git
cd pimatic-dimmer-proxy
npm i
then re-start pimatic.
@amit-patel said in Add Buttons to a Dimmer:
Also, to all, this plugin hasn’t been published to npm yet.
The plugin can also be installed using npm by using “method 1” as described in https://forum.pimatic.org/topic/1114/updated-how-to-install-a-plugin-from-github-using-npm-or-git
The advantage of this method is the package can be simply updated later via pimatic frontend at later stage when the package will have been published. Using git directly will require removal of the installation directory from the file system.
"It always takes longer than you expect, even when you take into account Hofstadter's Law.", Hofstadter's Law


") asked before some months ago
asked before some months ago