have changed topic and content of the thread since the issue has been solved by nyself ^^
HOWTO flash a max cube with aculfw to make it become a CUL
hey guys and girl ")
first of all - if you condider to follow the below tutorial be aware to use at your own risk!!
got the pimatic-maxcul plugin to run. for that, i have shot a max cube at ebay and flashed it with the aculfw 1.21.
the aculfw is an improving of the culfw. the cube now react as CUL.
pros / cons
the benefits are, you don’t need the cube a “middleware” anymore. the cube will become a transceiver device.
check here for some more information on the maxcul plugin
https://pimatic.org/plugins/pimatic-maxcul/
unfortunately the plugin does not support the max wall thermostats yet, since i use them in every room for manual override of the preinstalled program. maybe @fbeek can have a look in the future.
also there is NO scheduler anymore like the original max software has had. for that you either need rules or the chronotherm or mythermostat plugin
basic knowledge:
a CUL is a device for receiving / sending RF messages attached to the usb port similar to our homeduino. mostly the CUL is used for integration of homematic / 868 MHz based hardware into home automation software. since the max hardware runs on 868 MHz we need special device to communicate with the hardware. homeduino is only capable of 433 MHz RF. And here’s where the CUL comes into play.
I followed this turorial here to transform my max cube into a CUL (on my raspberry) :
https://forum.fhem.de/index.php/topic,38404.msg378455.html#msg378455
erase the cube’s flash and bootloader
first you need to erase the cube. if you do that, there is no way back  there is no cube software to reflash and get back to the cube mode. so no is the right time to think about any further actions
you will have to short the pins on j1 on the cubes pcb and plug it into the usb port to power it up for 5 seconds. i have soldered a pinheader and used a jumper for that but you can do it with a piece of wire or a paperclip etc.
so short pin j1, plug in the cube for 5 secs while pin j1 is still shorted, unplug the cube and remove the shortage / wire / jumper etc. on pin j1, the cube is ready to be flashed now.

install software and flash bootloader
now go ahead with these steps, since you don’t have a choice anymore 
- get the neede programs
sudo apt-get unzip minicom bossa-cli - download the aculfw from my dropbox (i packed only the needed files together, if you want the whole content, see above for links)
wget https://dl.dropboxusercontent.com/u/72185313/Pimatic/aculFW_CUBe%20121B77.zip - extract the zip file
unzip aculFW_CUBe\ 121B77.zip -d aculfw - prepare the cube and flash the bootloader with bossa
cd /home/pi/aculfw/bootloader/
sudo bossashto start bossa in the shell
scanto connect to the cube. best is to have only the cube connected to the usb port, nothing else.
write bootloader_CUBE.binflash the bootloader
bootf truewill restart the cube - flash the firmware with the terminal program minicom (or another one at your choice!)
you need to get used to minicom. it’s a bit tricky to navigate at the beginning.
gonna show with several pictures what to do
minicom walkthrough
minicom -s start minicom, opens the setup screen. go to “Serial port setup”

here you press A and edit the line to /dev/ttyACM0 which your cube should be detected at. (you can see that with dmesg|grep usb and / or check the /dev directory if ttyACM0 exists). If you entered the serial device path press enter twice and then press escape to get to the main terminal
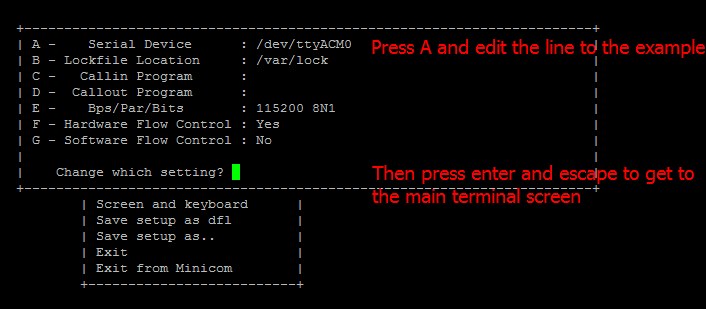
the main terminal looks like that

now press ctrl+ a together and then s (for to send the binary file with the firmware). you will see a new menu, navigate to xmodem and hit enter

now you have something like a file manager. navigate to your directory with the CUBE_BL.bin file.
the navigation is simple once you know how up and down arrow keys and the space key (hit twice for a double click to enter directories and mark the CUBE file)

Once the cube file is marked hit enter to upload the file to the cube

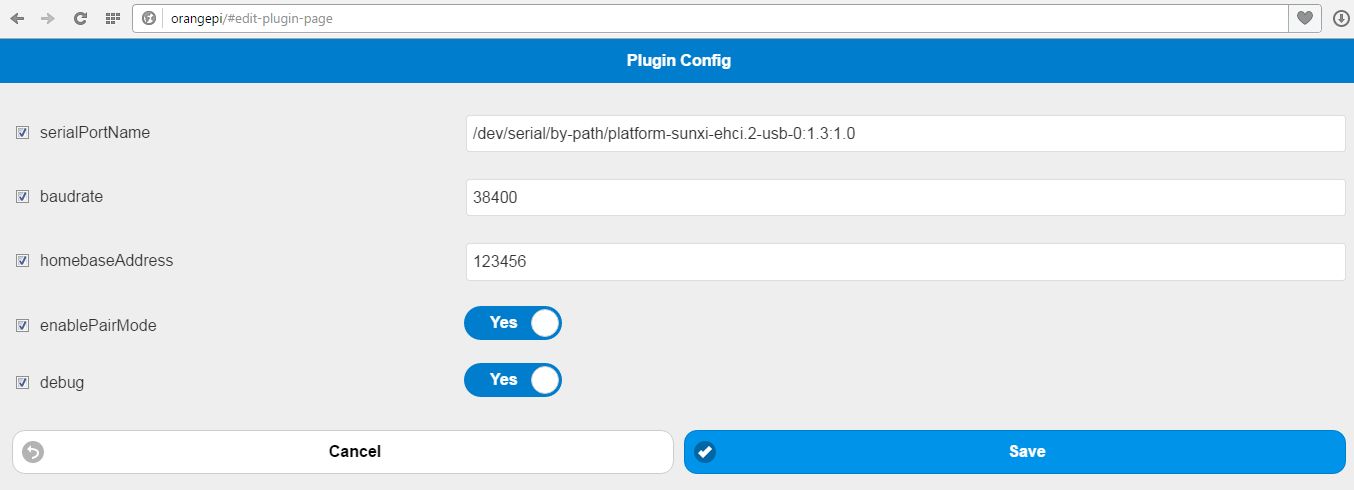
if you have installed the maxcul plugin, you need to set the device path (worked for me the best) and the baudrate.
that should be it. if everything is done, restart the cube and have a cul
looks a bit complicated but is a matter of 10 minutes if all is good going.
TROUBLESHOOTING:
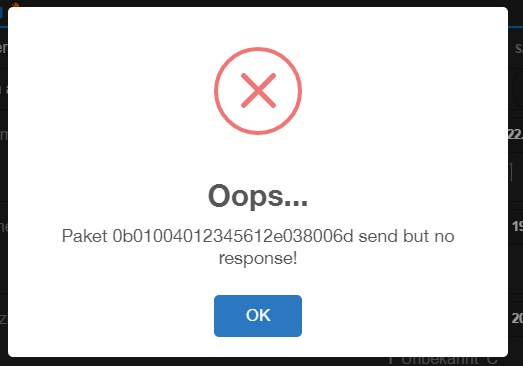
if you don’t get any useful debug output, it might be possible that your serialport baudrate is not correct.
then try to use sudo stty -F /dev/ttyACM0 38400 to set the portspeed accordingly.
here’s a sample of my debug data

you surely can use any other CUL too. gonna show in the next post my selfmade nano cul.


")