Now that you know how to build a device it’s up to spend some time with Homeduino.
What’s Homeduino all about? Homeduino will mainly control the 433MHz RF sending and receiving.
If you want to switch your wall plugs or lights or shutters etc. via RF and Pimatic, you won’t get around Homeduino.
There are two ways of using Homeduino :
- Flashing the Homeduino sketch to an Arduino Nano (preferred and cheapest hardware solution)
- Connecting the RF receiver and sender directly to the Raspberry Pi
Since the RF receiving and transmitting needs cpu power, it is recommended to use version 1 - Homeduino on Arduino Nano, but I’ll explain both options.
1.) Homeduino on Arduino Nano with standard setup
So let’s begin with the fun part 
What we’re doing now is to build the “Homeduino Transceiver”.
For that, we’ll need some hardware and some nice piece of software too.
After assembling the hardware, we’ll have to flash the Homeduino sketch to the Arduino Nano.
The Homeduino software on the Nano will take care of receiving, transmitting and filtering data.
When this has been done, we’ll go over and setup the plugin and a switch.
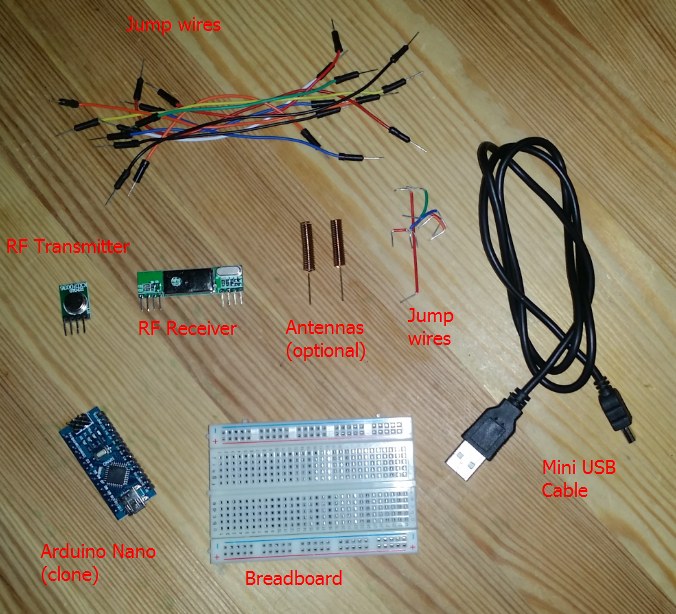
Here’s a little overview of what hardware is needed :
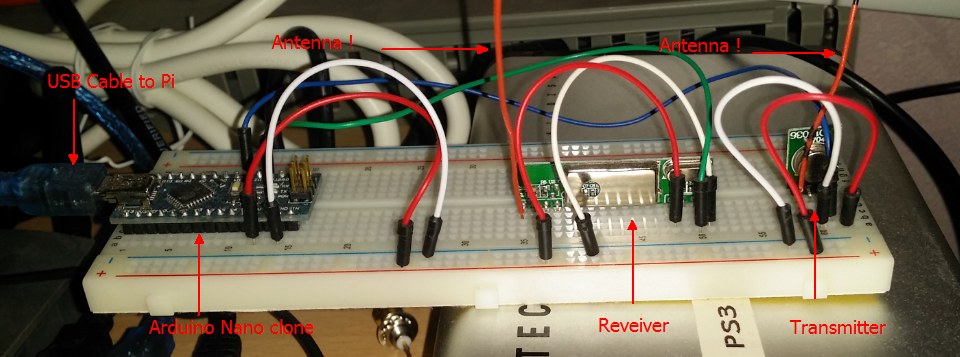
Assembled together it will look something like that :
I made a little Fritzing sketch with the receiver KSA6 and transmitter KXD10036.
(hope you can recognize it, it’s taken over 1:1 from the above picture, just some wire colour changed)
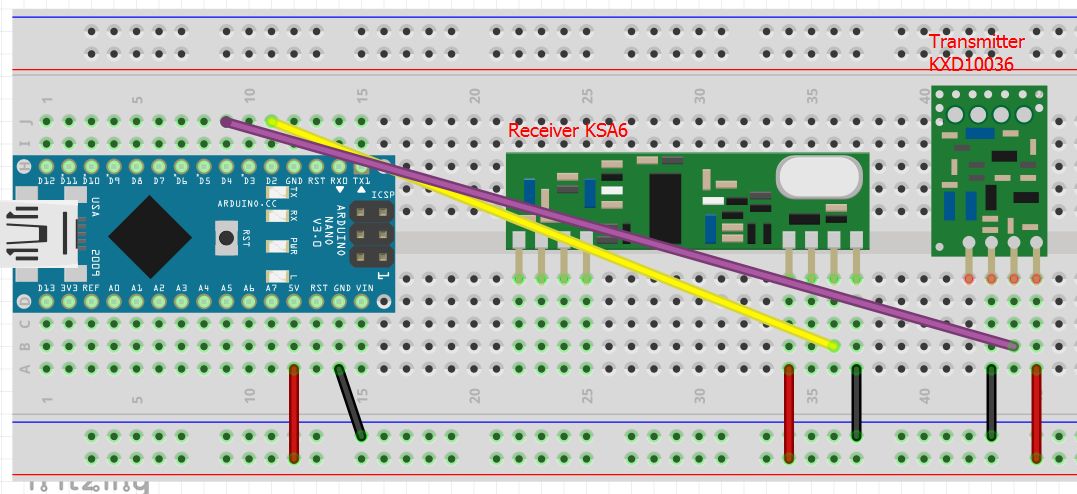
Maybe you’ve read about 3400RF - those are both parts of this RF kit, but mostly the receiver is meant by that. We recommend to use the 3400RF kit since it has the best price/performance ratio.
If you use other hardware you probably need to adapt the wiring!
Important for you to know is the following fact :
Connect the data pin of receiver to Arduino pin D2
Connect the data pin of transmitter to Arduino pin D4
For Homeduino the pin D2 will be 0 and D4 pin will be 4 (you’ll see later when setting up the plugin)
For better receiving you can use / plug into the breadboard / solder an antenna to the transmitter and receiver. Antennas and receivers have been and will be discussed for ages;). Since antennas have their own science, you’ll have to check out yourself what antenna suits best. For me and many others, a staight 17.5cm straight copper wire brings up the best receiving solution.
I have checked several antennas, but still the straight copper wire is unbeaten imo.
.
The next three steps will flash the Homeduino software to the Arduino Nano.
You can go through the below steps without any worry if you own an Arduino Nano 328 (or clone) and this is connected as USB0 device. Otherwise you’ll have to edit the Makefile first (see below!).
Flashing process :
1.) Install all necessary libraries
sudo apt-get install arduino-core avr-libc avrdude binutils-avr gcc-avr libconfig-yaml-perl libftdi1 libyaml-perl screen python-serial
2.) Copy the complete Homeduino working directory to the Pi. I cloned it into the pimatic-app folder, but you can also put it into your home directory. That doesn’t really matter.
sudo git clone --recursive https://github.com/pimatic/homeduino.git
3.) Now go to the Homeduino working directory you’ve just cloned from git
cd homeduino
4.) Upload the Homeduino sketch to the Arduino Nano but first stop Pimatic if it’s still running!!
sudo service pimatic stop
then
sudo make upload
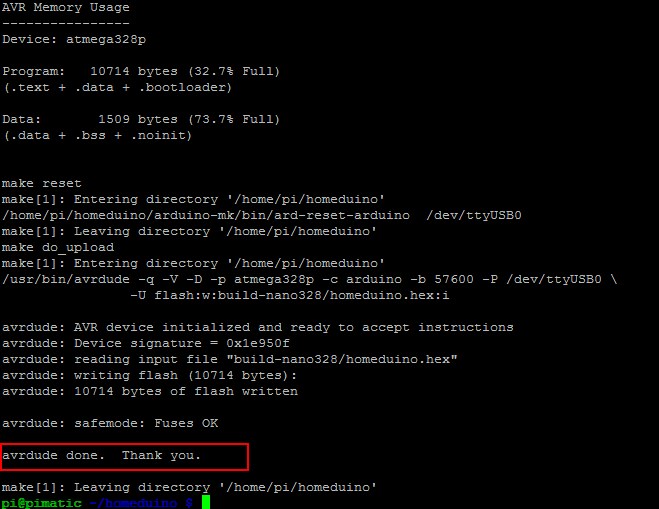
If the flashing process has been succesful, you’ll be prompted with this :

Now go ahead with setting up the plugin at the plugin section of your config.json (see below!)
.
EDIT THE MAKEFILE / TROUBLESHOOTING
If you have more USB devices attached and your Arduino is NOT on USB1 or you’re having another Arduino device you’ll have to edit the Makefile.
Just for your information : my Nano is the only USB device at my Pi and is located at USB0.
You can find out what USB port your Arduino uses with the command dmesg | grep tty
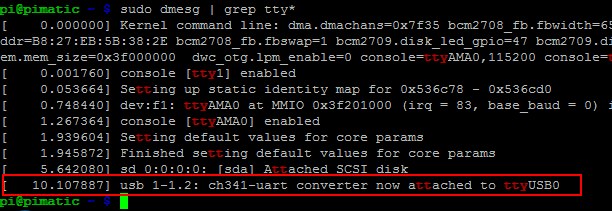
For an easy identification of the Nano, you can compare : the ch341-uart is the USB to serial converter on the Arduino Nano clones.
Now go ahead with sudo nano Makefile and change the MONITOR_PORT accordingly

If that’s all, leave the BOARD_TAG as it is.
If you’re having another device than the Arduino Nano 328 you’ll have to change the BOARD_TAG.
For that, you need to know which board you are using. Which one is it? Well that’s up to you, 'cause you owe it 
Run the command make show_boards You’ll get an output like that :
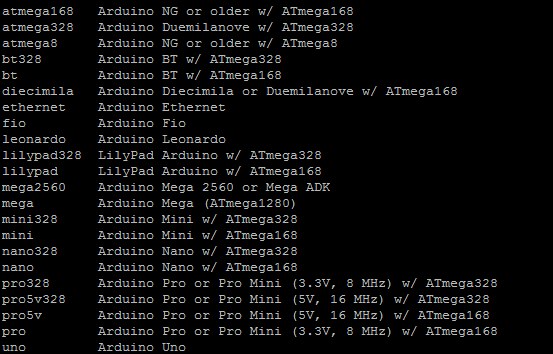
Pick your Arduino and change the Makefile accordingly.
Now execute sudo make upload again.
Your Arduino should be flashed when no Error comes up, congratulations 
.
.
Setting up the plugin at the config.json
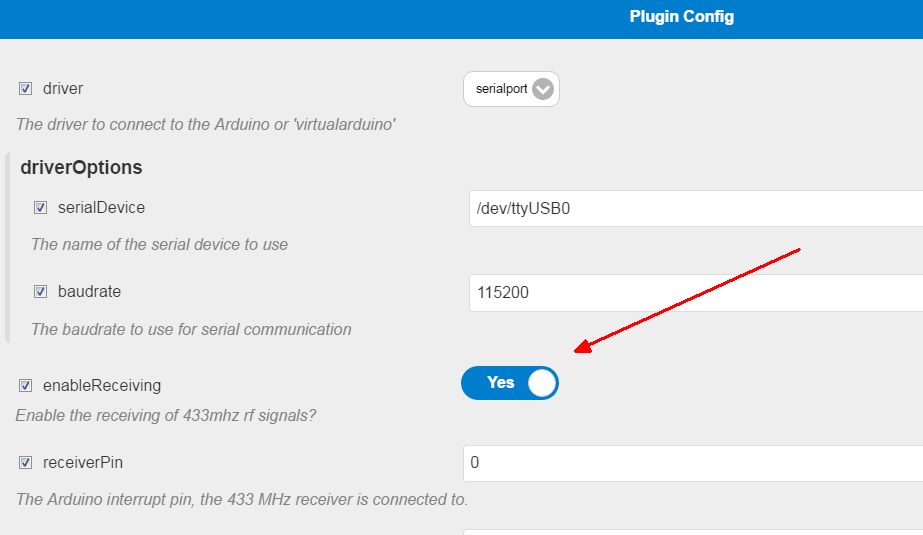
Now the last part of the Homeduino setup : copy the plugin settings to the plugin section of your config.json and maybe change the serialDevice to USB1 or wherever your Nano is located.
    {
      "plugin": "homeduino",
      "driver": "serialport",
      "driverOptions": {
        "serialDevice": "/dev/ttyUSB0",
        "baudrate": 115200
      },
      "receiverPin": 0,
      "transmitterPin": 4,
      "enableReceiving": true,
      "debug": true,
      "active": true
    }
Attention : If using an Arduio with 8MHz, you should set the baudrate to 57.200 otherwise you will have communication issues. Check here for more information!
If you followed the previous Howto parts, your plugin section should now look like that :
"plugins": [
    {
      "plugin": "cron"
    },
    {
      "plugin": "mobile-frontend"
    },
    {
      "plugin": "weather"
    },
	{
      "plugin": "homeduino",
      "driver": "serialport",
      "driverOptions": {
        "serialDevice": "/dev/ttyUSB0",
        "baudrate": 115200
      },
      "receiverPin": 0,
      "transmitterPin": 4,
      "enableReceiving": true,
      "debug": true,
      "active": true
    }
  ],
You certainly are able to install the homeduino and other plugins from the gui! Please have a look below to see the pimatic v0.9 homeduino plugin settings at the gui.
Now start Pimatic as you like sudo service pimatic start or sudo pimatic.js
Well done, you’ve made it!! Now take a deep breath, lay back and relax 
Go ahead with Step 5 - Homeduino : creating RF devices.
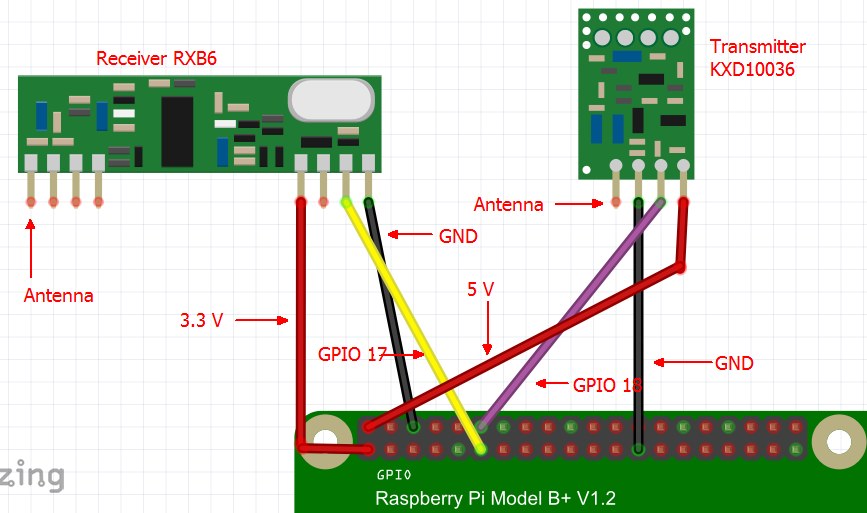
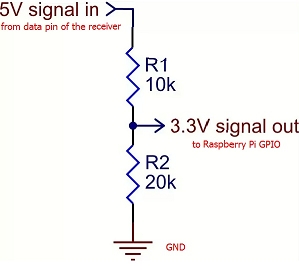
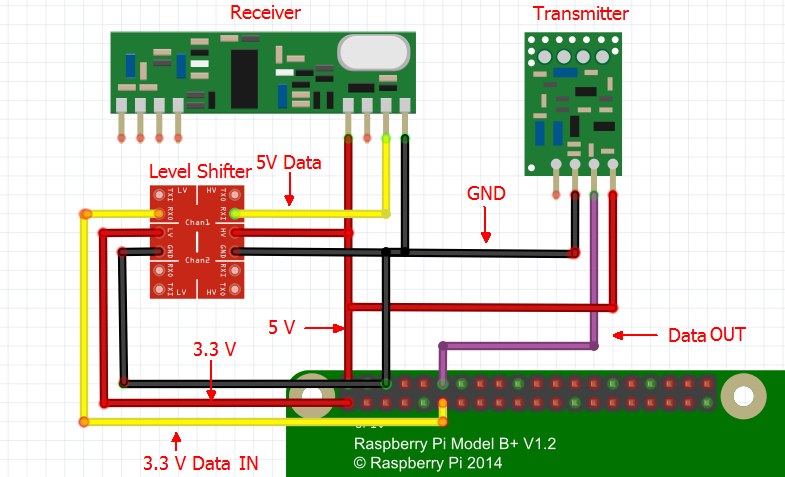
The below instructions are only for users without Arduino.


