This is a small guide howto build and setup a cheap soil moisture sensor using an arduino (with homeduino installed) for this task.
One importent thing i had in mind was that i don´t want the moisture sensor to be permanently powered with 5V as this will have a really big negative impact on the lifespan of the sensor! So i decided to power the sensor only for 20 seconds over an digital out pin of the arduino, do the measurement and turn it off again. For me it´s enough to make 3 measurement per day, but you can change this easily to your requirements.
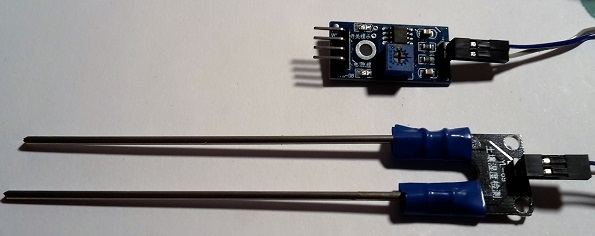
Shopping list:
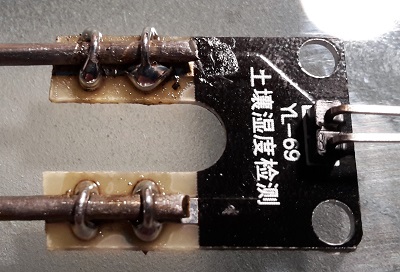
- Soil Moisture sensor (e.g. http://www.ebay.de/itm/Bodenfeuchtesensor-Garten-Feuchtigkeitsmessgerat-Soil-Moisture-Sensor-Arduino-/321588601923 ) €4,40 with shipping from europe, you can also get cheaper units from China (search for YL-69) but they normally take about 6-8 week for shipping.
-
some wires (if you are lazy: http://www.ebay.de/itm/Steckbrucken-Dupont-1P-1P-Jumper-Kabel-Drahtbrucken-fur-Arduino-10-20-30cm-wahl-/262044335376 -> they are available in different length and types)
-
a breadboard with an arduino nano (already installed and running in pimatic, if you don´t know how, check the guide in the forum)
Setup hardware:
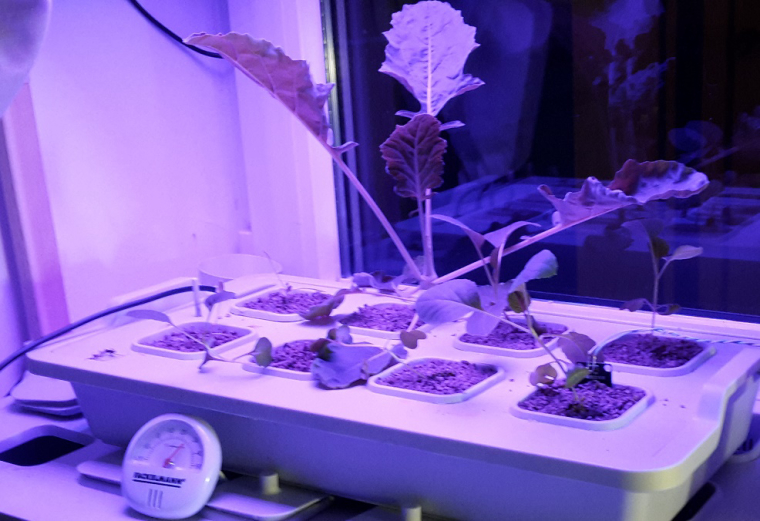
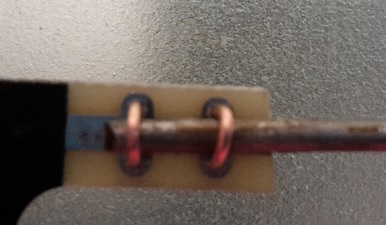
- place the sensor device in the soil and connect it with a “long” cable (e.g. 5meters 2x0.25mm²) to the interface pcb
- connect the pin AO (analog output) of the sensor interface pcb to pin A0 of your arduino board
- connect the pin VCC to D13 on the arduino board (as you don´t want the moisture sensor to be permanently powered with 5V)
- connect the pin GND to a GND pin of your arduino board
Prior to the next step be sure to stop the pimatic service before making the changes or you loose your changes:
sudo service pimatic stop
Software setup:
- create some new devices in your config.json (be sure to stop the pimatic service before doing this or you loose your changes)
- measurement device
 {
      "id": "moisturesensor1",
      "name": "FeuchteSensor1",
      "class": "HomeduinoAnalogSensor",
      "attributes": [
        {
          "name": "Feuchte",
          "unit": "",
          "label": "",
          "pin": 14,
          "interval": 10000,
          "processing": "$value"
        }
      ]
    },
- switching device to power the sensor
{
      "id": "pin-switch01",
      "name": "Pin Switch FeuchteSensor1",
      "class": "HomeduinoSwitch",
      "inverted": false,
      "pin": 13
    },
- variable device to store the values as you get readings with zero values when the sensor is not powered
{
      "id": "vmoisturesensor1",
      "name": "Feuchte Tomaten",
      "class": "VariablesDevice",
      "variables": [
        {
          "name": "vmoisturesensor1Var",
          "expression": "$Feuchte1",
          "type": "number"
        }
      ]
    }
- create the rules to read the sensor
- this rule turnes on the power for the sensor
(in my case at 8:00,14:00 and 20:00)
{
      "id": "startmoisturemeasurement",
      "name": "StartMoistureMeasurement",
      "rule": "if its 8:00  or its 14:00 or its 20:00 then turn on pin-switch01 for 20 seconds",
      "active": true,
      "logging": true
    },
- the next rule does the measurement
i wait 12 seconds before i save the value to the variable as the sensor value is checked every 10seconds.
the value is a combination of 0.7 * old_value + 0.3 * new_value just to flatten the value a little bit if the sensor value is jumpy. And in my opinion, the moisture is something that changes quite slowly, but if you live in a very hot area you probably have to change the value to 0.5/0.5 or even 0.3 / 0.7. But here i think everybody must make his own experience!
{
      "id": "readmoisturesensor",
      "name": "ReadMoistureSensor",
      "rule": "if Pin Switch Moisture 1 is turned on for 12 seconds then set $Feuchte1 = ($moisturesensor1.Feuchte * 0.3) + ($Feuchte1 * 0.7)",
      "active": true,
      "logging": false
    }
now you can save you config.json and start the service again
sudo service pimatic start
- Add the Variable Device to the GUI
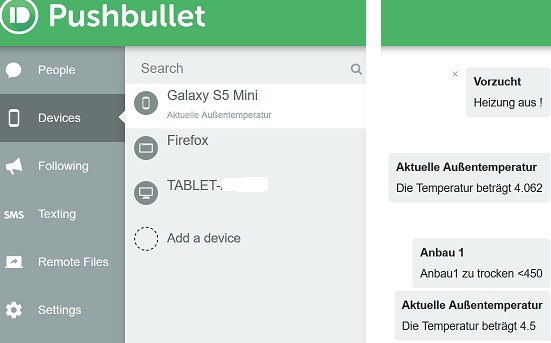
As soon as the pimatic service is running and ready, log in to the web interface and add the newly available variable device “Feuchte Tomate” to the place you like in the GUI.
Now it´s up to you what you want to do with this new information… start the irrigation with an rf switch to turn on the watering pump or send and email when the soil is dry or … or … 
i hope this guide is useful and will help some people!

")