
Some days ago i ordered 3 wall thermostates WT+ and 3 window contact sensors for the Max! heating control system. I ordered a DIY kit at the German vendor ELV. These DIY kits are some Euro cheaper but need to be soldered and assembled yourself. (I also had a 10 Euro discount code, so i saved more then 50 Euro for these parts!!)
WT+ DIY Wallthermostate at ELV appr. 22 Euro
Window contact sensor DIY at ELV appr. 14 Euro
Today I took the time to assemble these parts and want to share my experiences with you now.
The window contacts consists of a PCB and some plastic parts that just need to be assembled together.
If you want to easily save some money buy this DIY kit ! You don’t need to solder anything, just put some plastic parts together. Very unspectacular 
The WT+ wall thermostate is more tricky! If you don’t have good soldering skills and equipment DO NOT BUY THIS!!
Indeed they are 8 Euro cheaper but you will have to solder very little pins at the LCD screen.
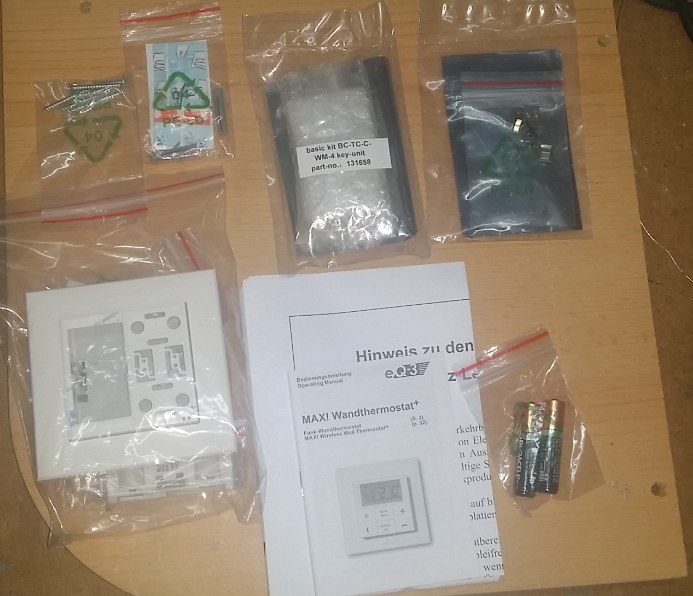
Here’s an overview of what i am talking about :
The DIY Kit is packed in plastic bags, the PCBs are stored in anti static bags
I began with soldering the LCD Display to the “mainboard”

Here you can see how small the pins are that need to be soldered.
For comparison I took a pen tip to show the dimensions

Two mainboards side by side to show the soldering

After that I soldered the energy board and 868MHz transceiver together.
The transceiver is soldered via a 2x4 row pinheader and you need to solder the battery “pins”.

Now it’s just assembling the parts together.
Put the energy board into the battery housing as shown below. The antenna must be at that direction where the pins are. The antenna will be stored between them.


Then assemble the mainboard onto the energyboard you just mounted into the batteryhousing.
Don’t forget to remove the screen protection!

Next step is to assemble the plastic parts.
First take the enclosure and fix the window with the adhesive tape.

After that plug in the buttons

Then assemble the enclosure with the batteryhousing/electronics

Done ")

BTW - I was talking about soldering equipment - I do not have expensive equipment but it is sufficient to solder these parts together. I recommend to use soldering stations with temperature control and a very small tip (I used 0.5mm). You don’t have to solder SMD parts, but the LCD screen pins are very small though.

It took me approx 25 minutes to assemble one WT+ wall thermostate.
")

