
The main core of Pimatic Homeduino is to handle 433,92 MHz RF devices. Homeduino can switch on/off, up/down and dimm RF devices. Also you are able to receive data from devices like weather stations, switches or other devices like PIR sensors and even more.
Here’s the overview of actual protocol implementations.
Let’s begin with an simple example for switching a remote wall plug.
You’ll have to follow these steps to create your Pimatic switch device :
- Determine the unit/id (or housecode/id) codes for your device.
- Create a Pimatic device and edit your config.json
- Add the device to your Pimatic pages
Step 2 and 3 you should already know from Pimatic Howto 3 - Creating a device
.
1.) Then lets begin with determine your device codes.
Every RF device has a unique RF adress, similar like an IP or MAC adress. This adress is mostly a combination of unit and id or housecode and id (depends on the protocol) or just an id.
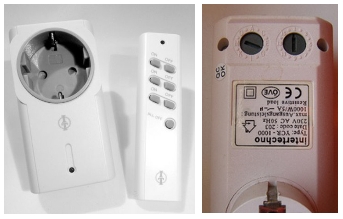
The above device is the wall plug YCR 1000 from Intertechno. I like Intertechno 'cause many devices have these “turn wheels”. They are easy to use and you can assign the codes for yourself.
Other devices have dip switches or are self learning.
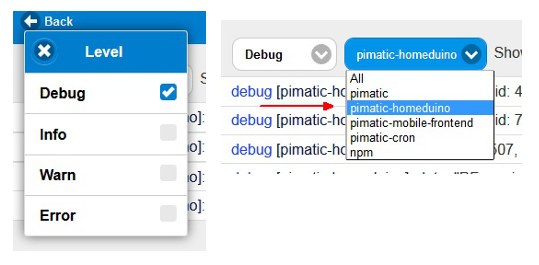
Ok, now go to the Messages and select debug option as well as homeduino.
Now you will see all debug messages from homeduino.
Take your remote and press the on button several times for switching your wall plug.
Homeduino will receive the the RF code and tries to translate it into the several protocols.
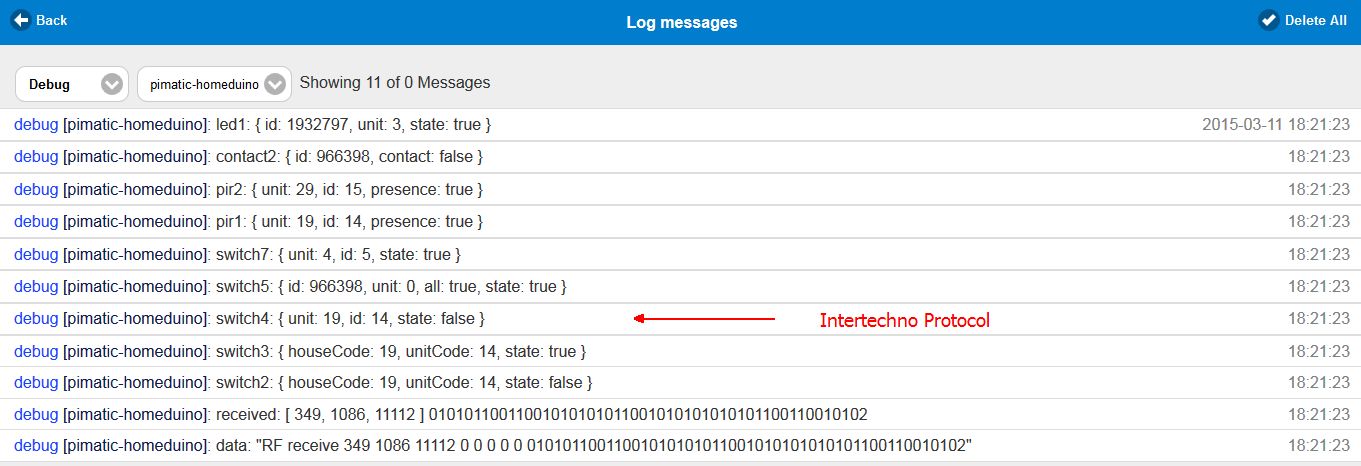
Now it’s up to you to decide which protocol you need. For that you’ll have to check the supported protocols.
For my above Intertechno switch it’s the switch 4 protocol. Now take a look at the debug output again and read the unit and id for switch 4. For my example it would be unit 19 and id 14.
That’s the common way to determine your RF identification adresses. For Intertechno I’ve created a table with all possible 256 turn wheel codes. If you don’t have a switch or remote at hand, you can read the unit/id codes from this table and create your device with it. Take a look at G3 and compare ID and unit code. G 3 that’s the combination on the wall plug turn wheels for Intertechno / Kaku / Düwi devices.4
.
2.) Device setup
After you’ve gotten the unit and id codes for the device AND you know which protocol to use, you can set up your device.
For code examples you can have a look here https://github.com/pimatic/pimatic-homeduino.
For my wall plug the Pimatic device looks like that :
    {
      "id": "wallplug",
      "name": "Wall Plug",
      "class": "HomeduinoRFSwitch",
      "protocols": [
        {
          "name": "switch4",
          "options": {
            "unit": 19,
            "id": 14
          }
        }
      ]
    },
Change this example according to your needs and insert it into the device section of the config.json.
Should look like that :

(remember the weather device from Howto 3 ") )
)
.
3.) Add the device to your pages
After you have edited and saved your config.json go ahead and start Pimatic.
You’re now on the start screen. Remember how to add devices? OK, I’ll tell you :
-
Click on the edit button

-
Click add ne item

-
Click + do add your device and then the back button in the upper left corner

-
Click the hook to return to your main screen

-
Voila! Here you are - your new switch.

Now you know how to add your switchtes. Maybe you will create a new page for your RF switches or maybe pages for each room in the house to get a clearly arranged interface.